

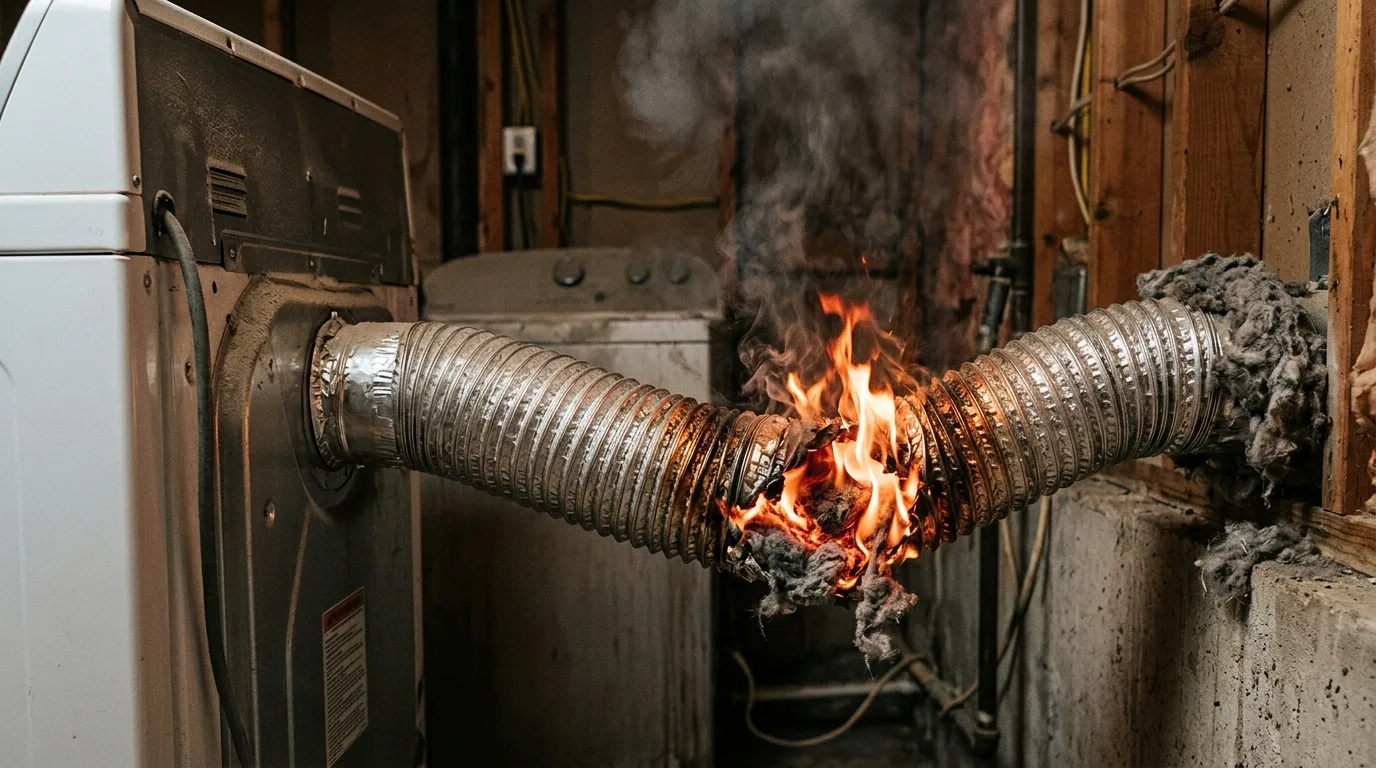
Regular cleaning of a clothes dryer is not only a question of hygiene, but of safety too. Even if you carefully clean the filter after every load and wipe down the cabinet, lint, dust and bits of fabric can build up inside the machine. Over time they lower its efficiency and raise the risk of a dryer vent fire.
The numbers are not small. According to the Escondido Fire Department's dryer safety facts, 2,900 home clothes dryer fires are reported each year, causing an estimated 5 deaths, 100 injuries and $35 million in property loss. Failure to clean the dryer (34%) is the leading cause. More dryer fires happen in fall and winter, peaking in January. Below we look at how dryer vent fires start and what to do so the machine lasts longer and runs without trouble.
How Do Dryer Vent Fires Start: Lint and Airflow
During every cycle, lint from fabrics collects on the filter, and this lint catches fire easily. That is why it has to be removed after each use.
The channel that carries hot air and moisture out of the machine is just as important. Lint that builds up inside it makes air circulation worse and can lead to overheating, so the vent has to be inspected and cleaned regularly, following the manufacturer's recommendations. Built-up lint can overheat and ignite, especially when the vent channels are clogged. So, can a dryer vent catch on fire? Yes, and this is the usual way it happens.
Without proper attention, lint, dust, greasy deposits and detergent residue begin to collect on the internal parts. This leads to lower efficiency, overheating, unpleasant odors and even breakdowns.
The cause can also be what goes into the drum. Grease and oil do not dissolve well in water and can stay in the fibers even after a normal wash cycle. If such fabric is put in the dryer, the residue can create a fire risk under high heat. Towels and rags that touched oil or grease in the kitchen, garage or workshop are better dried naturally, on a line or a drying rack, even after washing. Fabrics with traces of gasoline, paint thinner, acetone, wax and other flammable substances are a special danger. Even after cleaning they should not be dried with heat unless the appliance manufacturer or the item's label clearly allows it.
The Filter Every Load
The lint filter has to be cleaned before and after each drying cycle. A dryer that runs with an uncleaned filter overheats, and drying takes longer.
- Every load. Clean the lint filter after each run.
- Every few months. Remove the filter screen and rinse it under running water with soap, carefully cleaning all the corners with a brush. Then let it dry completely.
- The filter housing. If you have a suitable vacuum attachment, go over the filter compartment. Without one, use a thin brush and remove leftover lint by hand.
- Extra screens. Once a week, check any additional screens if your model has them.
Myth: if you clean the filter after every load, nothing else needs to be done. The truth: the filter does not hold back all the lint. Part of it settles inside the channels.
Running without a filter is a separate mistake. Lint clogs the vent, raising the risk of overheating and even fire.
Cleaning the Vent Duct
How often to clean the dryer vent? It depends on how hard the dryer is used, but a deep cleaning is often done every 6–12 months. The vent hose should be cleaned at least once a year, and with heavy use, every 6 months. A full cleaning can take an hour or more, including taking the duct apart and putting it back together.
What you will need:
- A soft cloth and warm soapy water.
- An all-purpose cleaner (optional).
- An old toothbrush or a special brush for cleaning vent channels.
- A vacuum cleaner with a narrow attachment.
The order of work:
- Turn the dryer off. Before any work, disconnect the machine. An electric dryer, simply unplug it; a gas dryer, also shut off the gas supply and move it carefully so the gas line is not strained.
- Clean the cabinet. Move the dryer away from the wall and wipe the cabinet thoroughly with a soft cloth and warm soapy water. Do not forget the control panel, buttons and knobs.
- Clean the drum. The inner walls of the drum, the baffles and the seals are wiped with a soft cloth and soapy water or an all-purpose cleaner. Then run a short cycle with clean towels so the drum dries completely.
- Find the vent outlet. Outside the house, find where the dryer duct exits. It is usually on a wall or the roof; a roof outlet is a job for a pro. Remove the plastic cover that protects the channel from dust and insects.
- Disconnect the hose. Then, inside, disconnect the corrugated hose from the back of the dryer. This may take a screwdriver or squeezing the clamps.
- Brush the duct. Carefully insert the vent brush into the tube and move along the bends, sweeping dust and lint outward. Whatever falls out at the other end, pick up with the vacuum. For deeper cleaning you can use a special flexible vent cleaning kit; it is easy to find in hardware stores.
- Put it back. Once the duct is clean, put the cover back in place, fasten the hose and reconnect the power (and turn the gas back on, if needed). Carefully move the dryer back.
- Run an empty cycle. This helps remove leftover lint and shows whether any extra moisture or debris is still inside.
Can a vacuum be used instead of a brush? Yes, but the brush helps reach lint in the bends and hard-to-reach spots. If the dryer still dries poorly after cleaning, check the duct outside. Lint may still be packed there, or debris may be stuck.
Dryer Vent Fires in Condominiums and Small Laundry Rooms
At least once every six months, check the duct that leads outside. This is where dryer vent fires in condominiums and apartments start to matter, since the dryer there often has a long duct run to the outside. Disconnect the exhaust hose (if there is one), inspect the outlet and remove leaves, cobwebs and dust; if the outlet belongs to the building, ask the HOA or building manager. Clean the channels from the inside with a soft brush or a vacuum with a narrow attachment. Make sure air passes freely.
In tight rooms humidity goes up and dust settles faster. The fix is simple: use a dehumidifier and turn on the exhaust fan during drying. This lowers the load on the appliance and keeps odors from forming. Do not set the machine flush against a wall, and do not leave its vent slots covered.
Foil vs. Rigid Duct
If a corrugated duct is used, replace it with a smooth one. It holds back less thread and fluff.
Myth: metal ducts do not need care. The truth: fabric particles and dust build up inside them too.
Watch that the corrugated hose is not pinched or bent sharply. A dryer moves a lot of air every hour, which is why clean ducts matter so much.
The Outdoor Flap
The outside grille can also get clogged with lint, leaves and other debris, so air leaves the house less easily. Make sure the vent duct is not damaged, crushed or blocked, and that the outdoor flap opens freely while the dryer is running.
In spring and fall, do a full check of the vent. Before winter, make sure the seals are tight.
Warning Signs: Hot Clothes, Long Cycles, Burning Smell
The first warning signals tell you that the equipment needs service:
- Lower performance. Clothes are still damp after the cycle ends. The cause may be a clogged vent.
- Longer cycles. If drying takes noticeably longer than usual, the lint filter or the vent is probably clogged.
- Unpleasant odors. Rotten or musty smells show that moisture and organic residue have built up somewhere and bacteria have started to grow.
- Unusual noises. Squeaking, humming or vibration can come from fibers stuck to moving parts.
- Overheated cabinet. An overly hot outer surface is a sign the dryer cannot vent its heat.
- Error messages on the display. Modern machines with fault detection report critical contamination of sensors or air ducts.
- Visible lint. Lint on the rubber seal around the door or the loading opening, and on clothes you take out, is a direct signal to clean.
- A stuffy, damp room. The air in the laundry room becomes too humid during drying.
If you notice at least one of these signs, it is time for maintenance.
Do not ignore a burning smell. It points to overheating from a clogged vent and needs urgent diagnosis. Stop using the dryer if it smells of something burning. If you see smoke or flames, get everyone out and call 911.
Dryer Vent Fire Prevention: Short Checklist
- Before loading. Empty pockets of small debris, remove heavy dirt, treat stains, sort items by fabric type (terry and wool shed more lint).
- Load size. Do not overload the drum. This interferes with air circulation.
- Drum. Wipe the drum 1–3 times a month, without abrasive products.
- Vent. Clean the vent completely at least once a year.
- Rubber, foam and plastic. Be careful with items that contain rubber, foam or plastic, such as some rugs with a rubber backing. High heat can damage these materials and in some cases create a fire hazard, so check the label before drying.
- Manufacturer's schedule. Follow the schedule in the owner's manual.
The main rule from the Escondido Fire Department: keep clothes dryers and vent hoses free of lint buildup.
After a Dryer Fire: Smoke and Soot Cleanup
A fire can leave many consequences, and some of them are not obvious at first glance.
- Physical damage to property. Depending on the strength of the fire, this can be damaged walls, ceilings, furniture and appliances. Sometimes full replacement is needed.
- Soot and smoke. Even if the fire was put out quickly, soot and the smell of smoke can stay a long time, getting into upholstery, textiles and even walls.
- Stress. A fire is serious stress, and it is important not to ignore your feelings. Talking with family and friends helps.
The first step toward getting the home back is assessing the damage. Before starting cleanup or repairs, it is important to understand what exactly was damaged.
- Assessment. Once the fire department says it is safe to go in, look over all the damaged areas and take photos for insurance.
- A plan of action. Decide which work has to be done first. This may be temporary bracing of walls or replacing electrical wiring, work for licensed pros.
- Safety. Work should be done only with the electricity off and other hazards removed.
Cleanup after a fire is a complex, multi-step process. First comes removing the remains of burned materials, everything that can give off a bad smell or be unsafe for health. Then comes cleaning the surfaces, a stage better left to people who use special products to remove residual soot and smoke. Then the rooms are disinfected. The sooner cleanup starts, the fewer unpleasant consequences there will be. Water used to put out the fire is its own problem; see how water damage restoration after a fire works, and why damp materials left behind can later call for mold remediation in the home.
For soot on walls, ceilings and belongings, read about fire and smoke damage restoration. Items that survived but smell of smoke can be taken out for cleaning and storage; this is what pack-out and contents cleaning services are for. After cleanup comes repair: walls and ceilings, wiring and plumbing that the fire may have damaged. Make decisions carefully and do not hurry.
You can learn who we are and how we work, read what homeowners say in reviews, find more articles on our restoration news and tips page, or go back to the Escondido restoration home page.