

Where Mold Comes From After a Leak and Why It Matters
Dark spots at the tile joints in the bathroom, gray film behind a cabinet, a damp smell in the corner of the kitchen — a familiar picture for many homeowners, especially after a hidden plumbing leak. The question of how to prevent mold after a plumbing leak usually comes up when the fungus is already visible to the naked eye, even though the process starts much earlier: spores settle on a wet surface and spread as long as conditions stay favorable for growth.
Mold appears where three factors come together: elevated air humidity, weak ventilation, and a surface that suits the spores. Bathrooms, kitchens, areas around windows with heavy condensation, corners behind furniture pushed right up against an exterior wall — in all of these zones moisture lingers longer than normal and the air barely circulates. Building materials have different resistance to colonization: drywall, wallpaper, and untreated wood absorb moisture and become a growth medium for the fungus, while tile and glass hold out longer, although the grout between them is also vulnerable.
The danger of mold is not limited to how it looks. Spores get into the air and, when inhaled, can trigger allergic reactions, irritation of the airways, and chronic coughing — particularly in children and people with sensitive immune systems. Black mold is considered the most aggressive variety: it releases toxic compounds and demands thorough treatment of the affected area, not just a cosmetic wipe-down of the surface.
Why Plumbing Leaks Create the Ideal Conditions for Mold
Mold is not just dirt or a random stain. It is a living organism — a fungus that thrives in dark, damp, warm places. And what do we have under a sink or behind a washing machine? Usually it is a perfect setup for mold: pipes that sometimes drip, poor ventilation, no sunlight, and plenty of hidden corners where it can grow undisturbed. You wash dishes, and somewhere down below, drop by drop, moisture accumulates. Add scraps of food that accidentally ended up in the cabinet, or an old rag forgotten in the corner — and the mold is already settling in.
Even a small, slow leak from a pipe joint or a worn-out gasket is enough to keep a cabinet floor permanently damp. In Escondido, where summer temperatures routinely stay above 90 °F, condensation on cold-water pipes adds another layer of moisture that most homeowners overlook.
Mold reproduces through spores that float in the air. They are so tiny you do not even notice them, but the moment they land on a suitable surface the colonization begins — especially if you rarely look under the sink or behind the appliances. So the first step toward prevention is understanding what attracts the fungus and cutting off its comfort.
Fast Diagnosis: How to Find Mold Before It Spreads
Mold is a master of camouflage. It can grow for months in hidden spots before you notice anything. But there are several clues that help you catch the problem early.
- Smell. If the area under a sink or near a pipe smells like dampness, earth, or something musty, that is already a warning sign — even if you do not see anything yet.
- Visible spots. Look for black, green, or white patches on walls, floors, or furniture. Sometimes mold looks like a fuzzy coating, sometimes like dark streaks. It usually grows unevenly and can spread across a surface.
- Traces of moisture. If the space under a sink is constantly wet, or you see puddles or droplets, those are ideal conditions. Check pipes, faucets, and the trap — even a tiny drip can cause a big problem.
- Damage to materials. Rotting wood, peeling paint, or wallpaper lifting from a wall — all of these point to prolonged moisture exposure underneath.
If even one of those applies, it is time to grab a flashlight and inspect. The earlier you find mold, the simpler it is to deal with.
What to Do Right After a Leak: the First 24–48 Hours
A leak — whether from a burst pipe, a failed hose connection, or a slow drip that finally let go — creates almost ideal conditions for fungal growth. Materials get soaked all the way through, not just on the surface, so within 24 to 48 hours the first signs of mold can appear on wet drywall, carpet, or wallpaper. This demands a different approach than ordinary cleaning: some materials are easier to replace than to save. Photograph the damage before cleanup to support a homeowners insurance claim.
The first step is drying the space as quickly as possible, including hard-to-reach voids behind baseboards and under flooring. Materials that cannot be dried thoroughly — waterlogged drywall, old carpet, peeling wallpaper — are better removed than rescued at any cost. After drying, treat the surfaces with an antiseptic compound and only then move on to finishing. Covering a still-damp wall with new material is a direct path to hidden damage to the framing and structure behind it.
Do not put off drying even for a couple of days. The longer the material stays wet, the higher the chance that mold will penetrate deeper than what you can see on the surface.
How to Remove Mold That Has Already Appeared
The method depends on the material and how deep the damage goes. On hard, non-porous surfaces like tile or glass, the fungus usually stays on the surface and comes off relatively easily. On porous materials — wallpaper, plaster, wood — spores penetrate deeper, and without the right treatment the stain will show up again within a few weeks, even after fresh repairs.
Common removal options
- White vinegar. Spray it on, wait an hour, wipe clean. Cheap and always on hand. The smell is strong but fades quickly.
- Hydrogen peroxide. Apply to the stain, scrub with a brush, rinse. Kills spores and lightens the surface, but may affect paint color.
- Baking soda paste. Mix with water to a thick paste, apply, scrub, rinse. No odor, safe for most surfaces. Requires some elbow grease.
- Chlorine bleach solution (1:10 with water). Powerful, but toxic — use a respirator and open windows.
- Antifungal primer. Applied before the finish coat. Prevents mold from growing under new paint or wallpaper.
One important point that people often miss: wiping mold off with a regular cleaning spray is not the same as killing the spores. Without an antiseptic primer and full drying, the stain will come back within weeks, even on a freshly painted wall.
Drying the Space Properly
Cleaning the visible mold is only half the job. If the source of moisture is not eliminated, the fungus returns to the same place within months — and that is not an exception but a pattern most homeowners encounter after their first attempt at do-it-yourself removal.
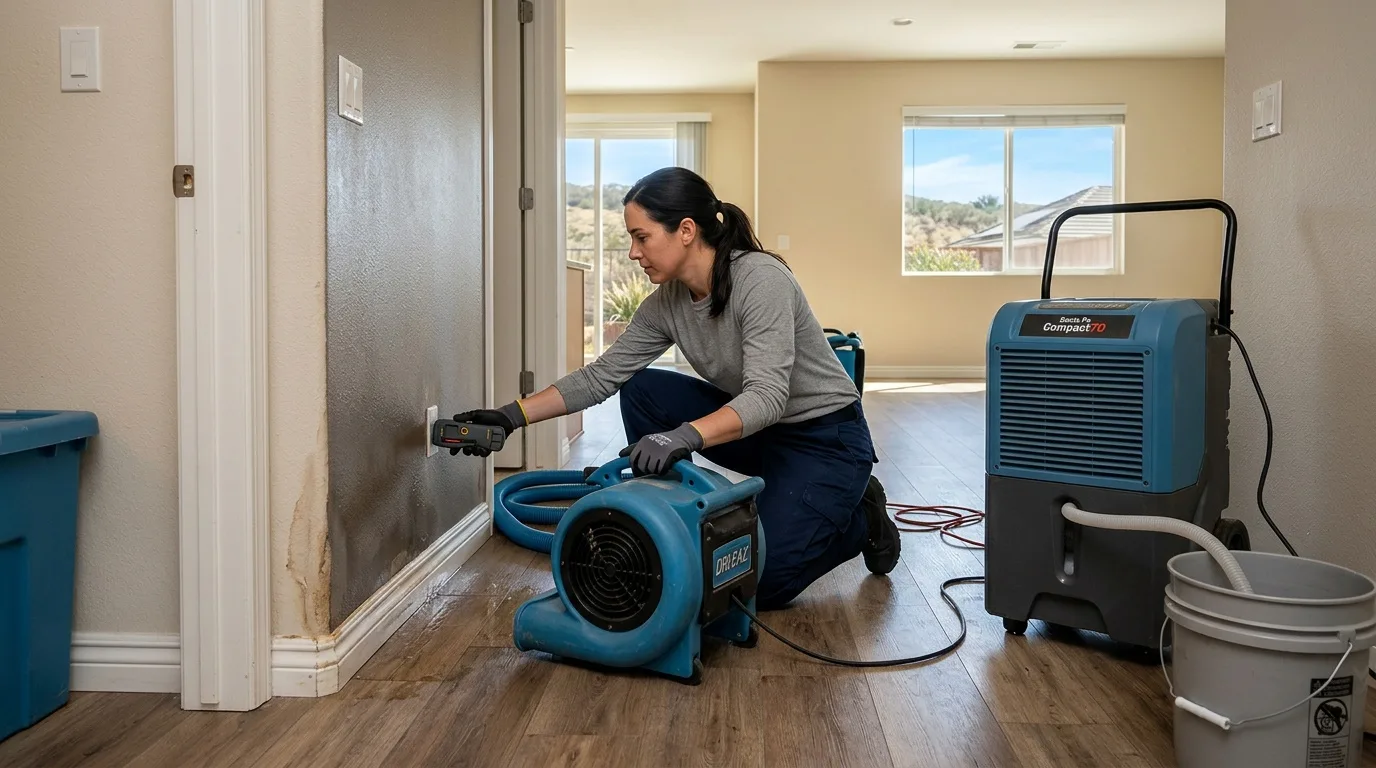
After any plumbing leak, the priority is bringing indoor humidity back to the 40–60% range. For a small area — an under-sink cabinet or a single wall section — opening the cabinet doors, running a fan, and keeping windows cracked may be enough. For a larger affected area, professional-grade dehumidifiers and air movers make a real difference. They pull moisture out of air and materials much faster than passive ventilation alone.
Do not cover a damp surface with new flooring, drywall, or paint. Sealing in the moisture creates a hidden growth zone that can go unnoticed for months until the smell gives it away — or until you start a renovation and find mold behind the new finish.
How to Prevent Mold After a Plumbing Leak: Long-Term Measures
Removing mold is one thing. Keeping it from coming back is another. And here simple habits come to the rescue — habits that make your home unsuitable for the fungus.
Keep everything dry
Moisture is mold's best friend, so your task is to keep the area around plumbing dry. After washing dishes or cleaning, check under the sink for puddles. If something spilled, wipe it immediately. Keep a rag or a small towel nearby — a couple of swipes and the surface is dry.
If condensation forms often, place a moisture absorber inside the cabinet — silica-gel packets from a hardware store, or simply a bowl of salt or rice, both of which draw moisture out of the air.
Improve ventilation
Air needs to move, otherwise dampness has nowhere to go. If a closed cabinet sits under the sink, think about how to let air in. You can drill a couple of holes in the door or leave the door ajar after using the sink. In bathrooms, make sure the exhaust fan actually works and runs long enough after a shower — at least 15 to 20 minutes.
Inspect plumbing regularly
Leaks are the main cause of mold near pipes, so watch your plumbing. Once every couple of months, look under sinks and behind appliances with a flashlight. If you spot rust, drips, or worn gaskets, do not wait. Replacing a part takes half an hour; fighting mold takes days.
What to check on a regular basis:
- Pipe connections and joints
- The trap (P-trap) under each sink
- Supply hoses to faucets, dishwashers, and washing machines
- Seals and gaskets at valves
Maintain normal humidity indoors
Keep air humidity in living spaces at 40–60%, especially in bedrooms and children's rooms. In Escondido's climate the outdoor air is often dry, but interior spaces with poor ventilation — bathrooms, laundry rooms, under-cabinet areas — can still trap enough moisture for mold to thrive. Do not dry laundry indoors in a closed, unventilated room on a regular basis. Once a season, inspect corners behind furniture and areas under windows for condensation.
Use preventive treatments
After cleaning, treat surfaces with a solution that discourages mold. A light spray of white vinegar once a month — five minutes of work — is enough for most under-sink cabinets. For walls that have already been affected, an antifungal primer before repainting is not optional but essential: it creates a barrier that spores cannot easily colonize.
When to Call a Professional
A small spot on the tile — a few square inches — usually responds to home treatment with vinegar or peroxide. The situation is different when the affected area exceeds roughly ten square feet, when mold keeps returning after you have already cleaned it, when there is a musty smell with no visible source, or when anyone in the household has developed coughing, allergies, or other respiratory symptoms.
Signs that you need professional help:
- Mold has spread behind walls, above ceiling panels, or under flooring
- The smell persists even after cleaning
- Health complaints — coughing, eye irritation, worsening allergies — have appeared in household members
- A wall or ceiling stays damp despite your efforts to dry it
Professionals use specialized chemicals and equipment to extract the fungus even from deep cracks and wall cavities. In Escondido, restoration companies familiar with the local building stock can also check whether the leak has caused structural damage that needs repair before any mold treatment makes sense.
Common Mistakes That Let Mold Come Back
A few widespread misconceptions make the problem worse instead of solving it.
Painting over mold. Paint may hide the stain, but the fungus keeps growing underneath, destroying the surface. Remove the mold first, let the area dry, apply primer, and only then repaint.
Treating the surface without fixing the leak. If the source of water is still active, no amount of scrubbing or spraying will stop the mold for long. Fix the plumbing first; treat the mold second.
Covering a damp wall with new material. Wallpaper, drywall, or flooring installed over a wall that has not fully dried creates a sealed pocket of moisture — exactly the environment mold needs. Let everything dry completely before closing it up with new finishes.
Ignoring the problem because the spot is small. Mold spreads. A few dark patches today can become a large colony in a matter of weeks if moisture stays available. Early action is always cheaper than late remediation.
Summing It Up
Mold after a plumbing leak is not a death sentence for your home — it is a problem with a clear sequence of solutions. Dry the area fast, find and fix the leak, remove affected materials that cannot be saved, treat surfaces with an antiseptic, and only then apply new finishes. After that, prevention comes down to simple routines: checking pipes, keeping spaces ventilated, wiping up moisture, and not ignoring the first signs of dampness. Investing a bit of time in regular inspections and humidity control pays for itself many times over by sparing you the cost and disruption of tearing out walls and redoing finishes a year later.